如何使用gdb
roslaunch
使用roslaunch命令运行功能包时,如何使用gdb调试?
在launch文件中的node标签添加一句话
launch-prefix="xterm -e gdb -ex run --args "
修改完后效果如下
<node pkg="waypoint_follower" type="pure_persuit" name="pure_pursuit" output="screen" launch-prefix="xterm -e gdb -ex run --args">
  ………
</node>
VS code调试ROS(cpp)项目
安装插件
在vscode的插件市场搜索ROS,安装由 Microsoft 开发的 “ROS”
环境配置
创建json配置文件
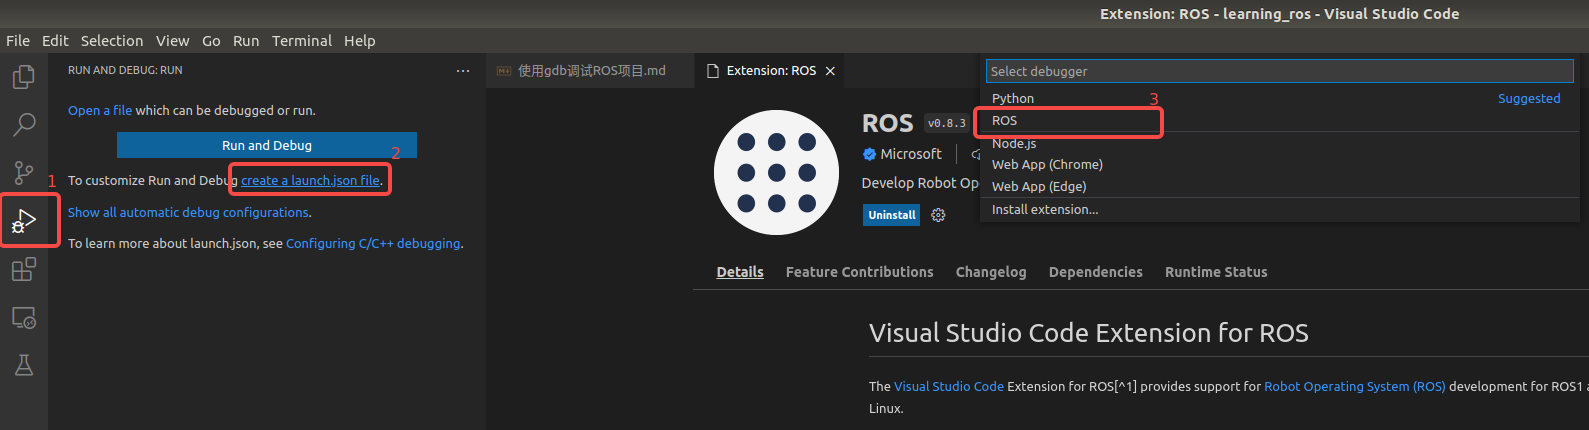
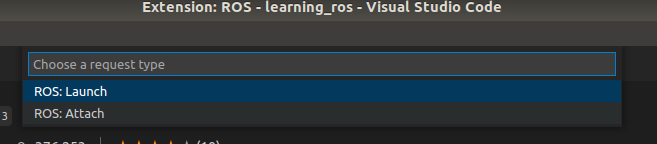
根据debug的方式选择
- 如果是使用roslaunch命令运行可执行文件和相应的
.launch文件,就选择 ROS: Launch - 如果是使用rosrun命令运行可执行文件,选择 ROS: Attach
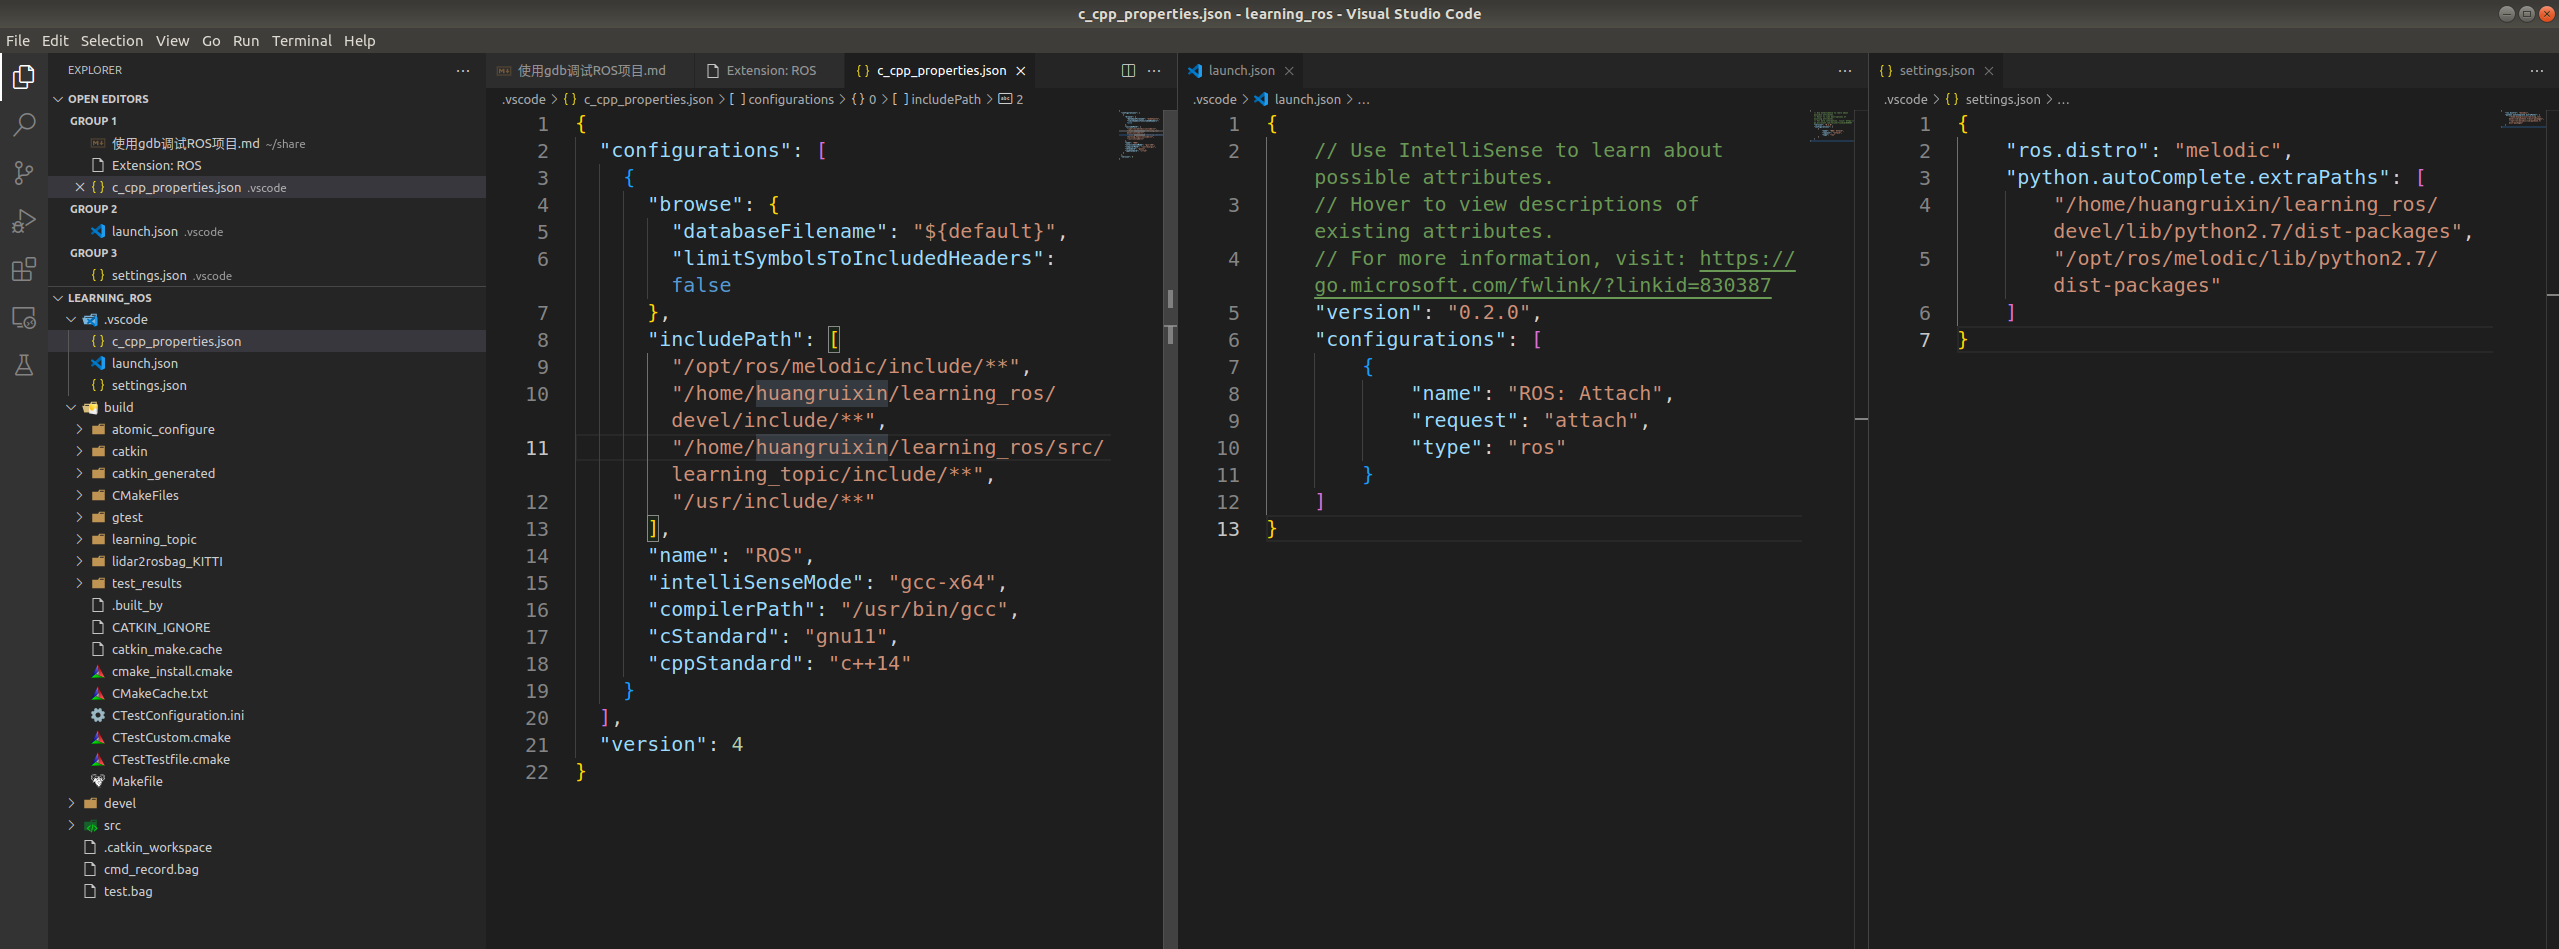
笔者选择attach,就会自动生成三个文件:c_cpp_properties.json、launch.json、settings.json
下面对它们逐一进行分析
launch.json
参看 vscode-ros 官方 readme–ROS Launch Configuration options
{
// Use IntelliSense to learn about possible attributes.
// Hover to view descriptions of existing attributes.
// For more information, visit: https://go.microsoft.com/fwlink/?linkid=830387
"version": "0.2.0",
"configurations": [
{ // ros attach 方式
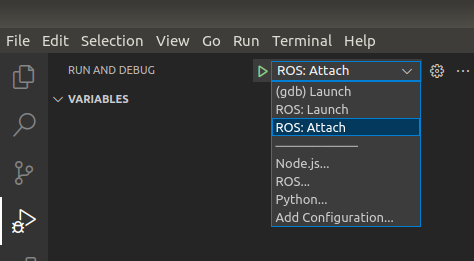
"name": "ROS: Attach", // 指定debug的名字,可以随便取,会显示在 vscode UI 界面上,如下图所示
"request": "attach", // 表明了debug的方式
"type": "ros" // ros程序
},
{ // ros launch 方式
"name": "ROS: Launch",
"type": "ros",
"request": "launch",
"target": "absolute path to launch file" // 正如描述所说,这里需要到luanch文件的绝对路径
}
]
}
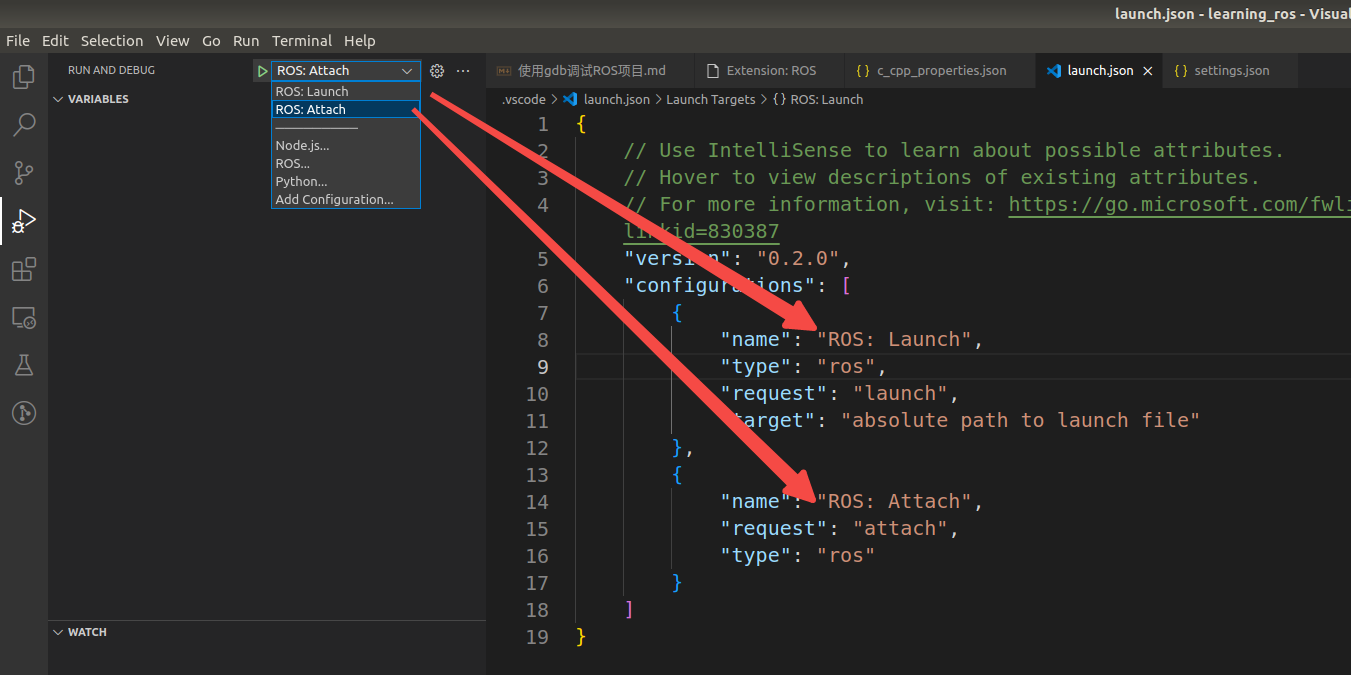
如果想要添加别的不同的配置,按照如下图片操作,这里我们以 c/c++ (gdb) launch 为例
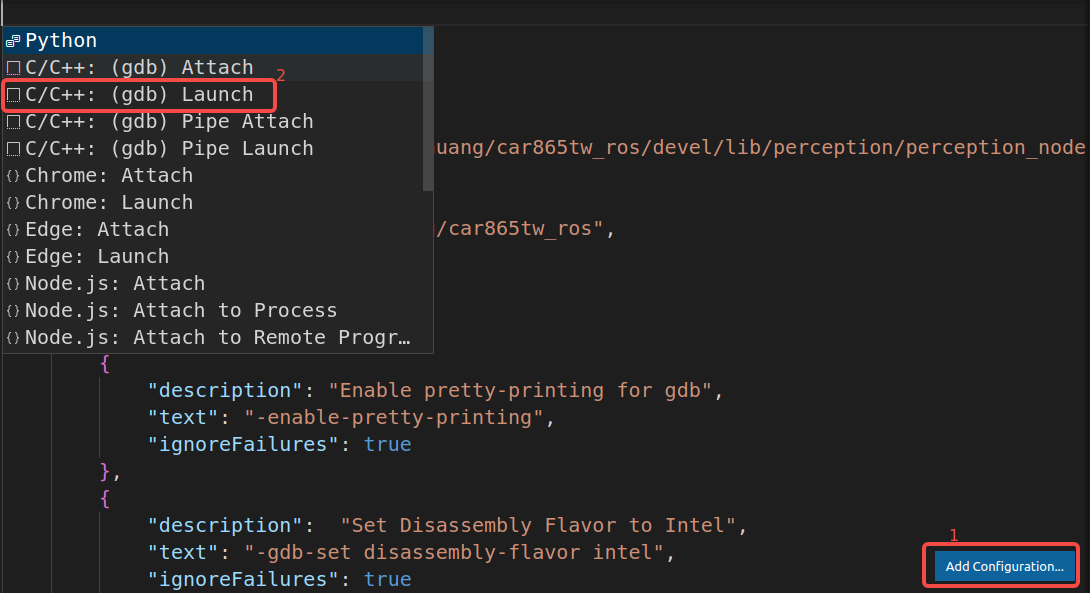
得到新的配置如下:
{
    // Use IntelliSense to learn about possible attributes.
    // Hover to view descriptions of existing attributes.
    // For more information, visit: https://go.microsoft.com/fwlink/?linkid=830387
    "version": "0.2.0",
    "configurations": [
        {
            "name": "(gdb) Launch",
            "type": "cppdbg",
            "request": "launch",
            "program": "enter program name, for example ${workspaceFolder}/a.out", // 需要输入可执行文件所在的位置, ${workspaceFolder}: The path of the folder opened in VS Code
            "args": [], // 程序执行时需要的参数,举个例子如 "args": ["--input_dim", "1,3,432,496", "--output"]
            "stopAtEntry": false,
            "cwd": "${fileDirname}", // ${fileDirname}: The current opened file's dirname
            "environment": [],
            "externalConsole": false,
            "MIMode": "gdb",
            "setupCommands": [
                {
                    "description": "Enable pretty-printing for gdb",
                    "text": "-enable-pretty-printing",
                    "ignoreFailures": true
                },
                {
                    "description":  "Set Disassembly Flavor to Intel",
                    "text": "-gdb-set disassembly-flavor intel",
                    "ignoreFailures": true
                }
            ]
        },
        {
            "name": "ROS: Launch",
            "type": "ros",
            "request": "launch",
            "target": "absolute path to launch file"
        },
        {
            "name": "ROS: Attach",
            "request": "attach",
            "type": "ros"
        }
    ]
}
settings.json
参看 vscode-ros 官方 readme–Workspace and Global Settings
{
    "ros.distro": "melodic",
    "python.autoComplete.extraPaths": [
        "/home/huangruixin/learning_ros/devel/lib/python2.7/dist-packages",
        "/opt/ros/melodic/lib/python2.7/dist-packages"
    ]
}
| Json Option | Setting Name | Description |
|---|---|---|
| ros.distro | ROS installation distro to be sourced | The Distribution to be sourced. On linux, this cause the extension to look for the ROS setup script in /opt/ros/{distro}/setup.bash. On Windows, c:\opt\ros{distro}\setup.bat |
c_cpp_properties.json
帮助我们点击方法或变量等时,能够跳转到引用或者定义,参看doc
{
  "configurations": [
    {
      "browse": {
        "databaseFilename": "${default}",
        "limitSymbolsToIncludedHeaders": false
      },
      "includePath": [
        "/opt/ros/melodic/include/**",
        "/home/huangruixin/learning_ros/devel/include/**",
        "/home/huangruixin/learning_ros/src/learning_topic/include/**",
        "/usr/include/**"
      ], //最重要的就是include,可以自行添加更多的头文件所在的目录,通过 /** 一次性添加此目录下的所有头文件
      "name": "ROS",
      "intelliSenseMode": "gcc-x64", // linux 平台默认值
      "compilerPath": "/usr/bin/gcc", // The full path to the compiler you use to build your project
      "cStandard": "gnu11", // c 标准
      "cppStandard": "c++14" // c++ 标准
    }
  ],
  "version": 4
}
补充:IntelliSense 是使编码更方便的一组功能的名称,这些功能包括:语句完成、成员列表、参数帮助、快速信息等等。总之就是帮你能够自动补全、鼠标停留的位置提示一些帮助你敲代码的信息,具体可以看 learning-microsoft
开始调试
选一种配置好的,你喜欢的去调试吧
高级用法
如何调试多程序/多node <font color = blue>一个节点就可以当作是一个程序</font>
==最质朴/简单的方法:==
新建一个 launch 文件,将想要启动的节点、配置参数等都包含进去,而后使用 ROS: launch 方法调试,指定 target 为此 launch 文件的绝对路径即可。
  <launch>
    <node name="<node_name_1>" pkg="<pkg_name_1>" type="<program_1>" output="screen" />
    <node name="<node_name_2>" pkg="<pkg_name_2>" type="<program_2>" output="screen" />
  </launch>
==稍微绕一点的方法:==
一般每个功能包下面都会有一个 launch 文件,指定启动此功能包下的程序/节点。(纯粹是管理文件的好习惯而已)
既然已经有了现成的 launch 文件了,那可以新建 catkin_ws/launch/XXX.launch ,并在其中包含所有需要的 launch 文件。
<launch>
		<include file="<path_to_launch_file_0>"/> <!-- 共享的配置参数文件 -->
  	<include file="$(find <pkg_name_1>)/launch/<launch_file_1>"/> <!-- 某功能包下的launch文件 -->
  	<include file="$(find <pkg_name_2>)/launch/<launch_file_2>"/>
  	<include file="$(find <pkg_name_3>)/launch/<launch_file_3>"/>
</launch>